Tapered Premium 8 Plait to Chain
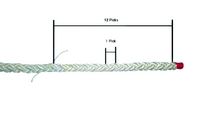
Figure 1
Step #1 – Beginning the Splice
First, lay out rope on a flat surface and count 12 Picks (crowns) from one end towards standing part of rope. Place a wrap of twine around the rope at this point and tie tightly (a double overhand knot would suffice).
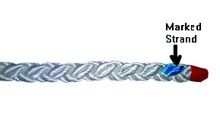
Figure 2
Step #2
Using the felt tip marker to mark the left rotating S-direction strands at the bitter end.
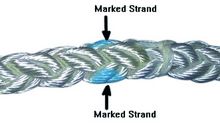
Figure 3
Step #3
Turn the rope over and mark the S-direction strands on the other side as well.
Figure 4
Step #4
Just past the tied wrap of twine, mark the first full set of S-direction strands.
Note:
For these marks you may want to use chalk, so that it will brush off after the splice is completed.

Figure 5
Step #5
Turn the rope over and mark the S-direction strands on the other side as well.
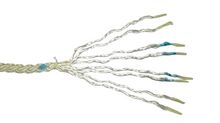
Figure 6
Step #6 – Strand separation
Remove tape from end of rope. Unlay (untwist) the rope a short distance and tightly wrap tape around the end of each individual strand. Continue unlaying the rope to wrap of twine. Make sure to not mix or twist them, keeping the strand pairs together.
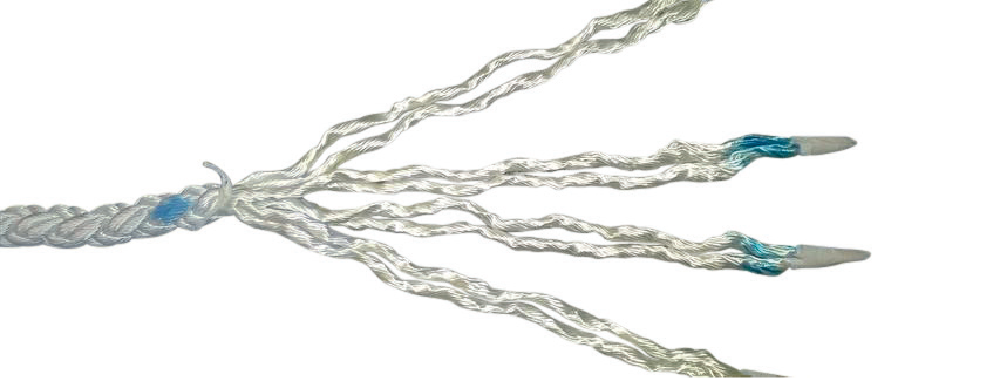
Figure 7
Step #7
Tape the ends of the stand pairs together.
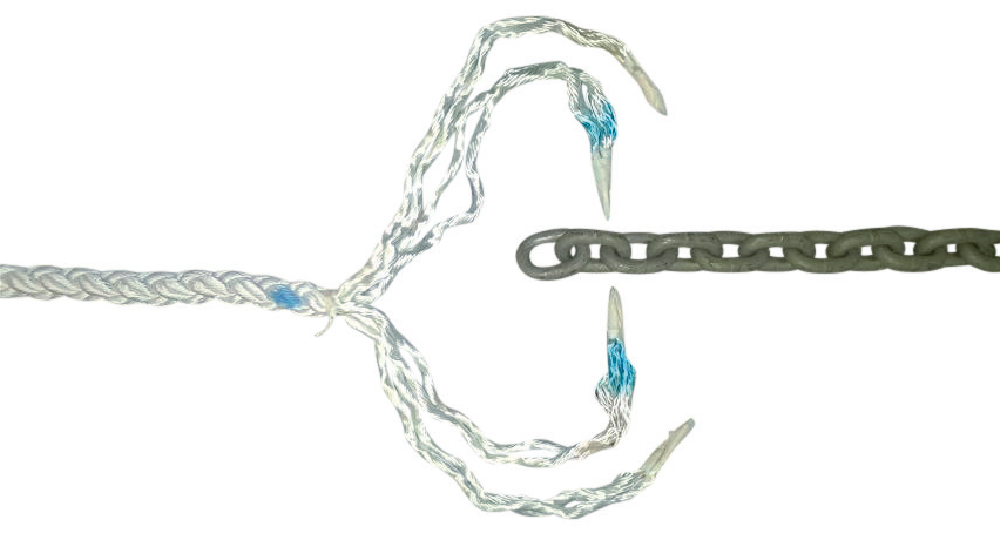
Figure 8
Step #8 – strand insertion through chain link
Setup one pair of S-direction and one pair of Z-direction strands on each side of the chain link.
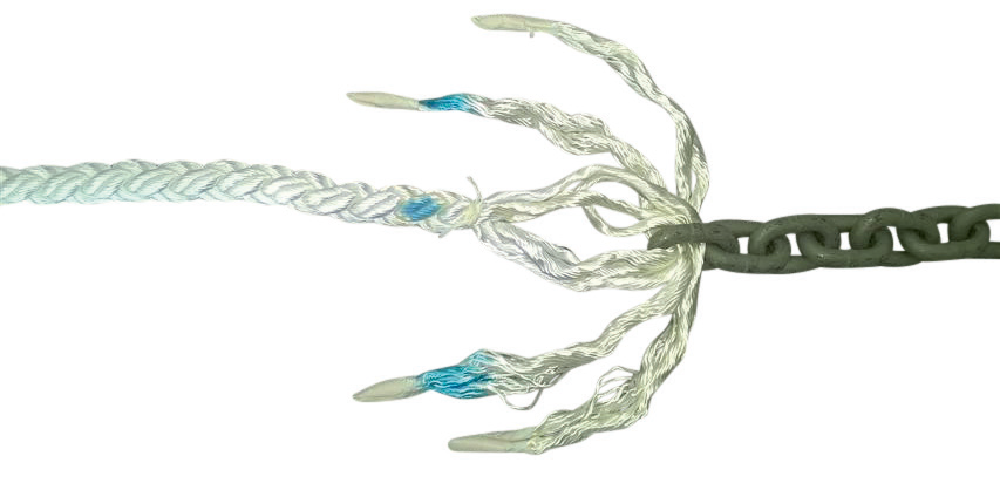
Figure 9
Step #9
Pass strands through the link from opposite sides in an alternating fashion
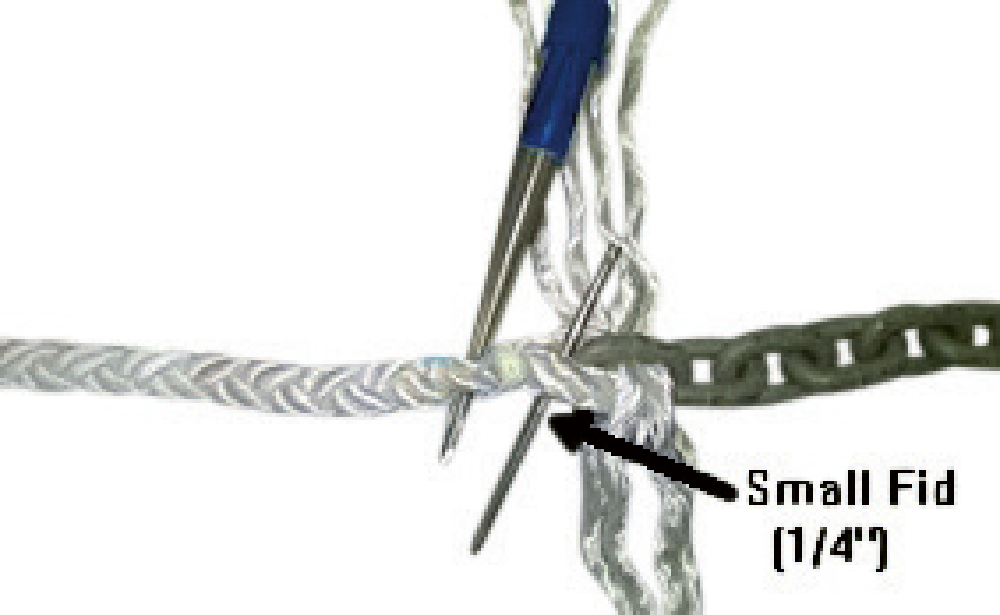
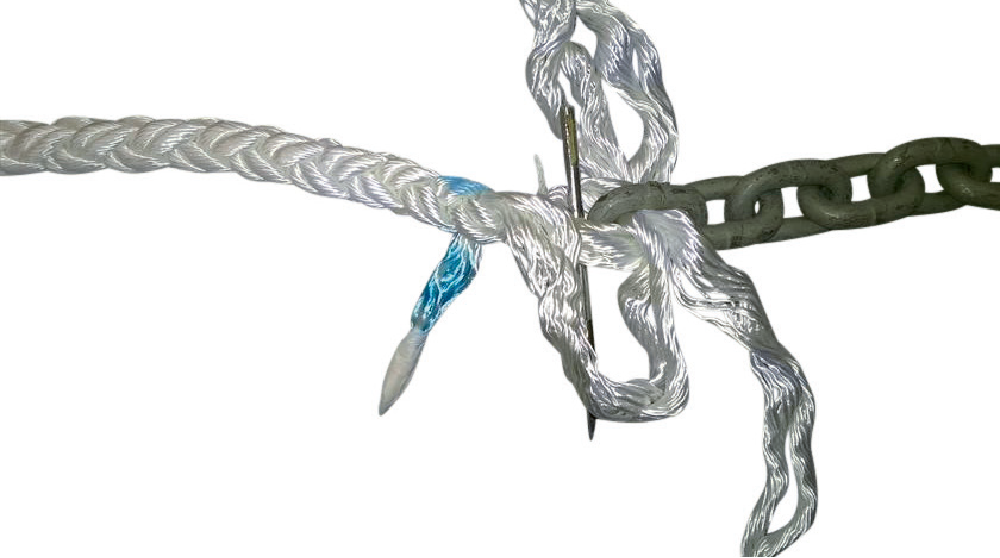
Figure 10
Step #10 – Initial strand tuck
To do the first tuck, using a fid, slightly raise a single pair of unmarked Z-direction strands on top of the standing part just below the twine so as to make clearance. Then tuck the first pair of marked S-direction strands under those Z-direction strands (as shown below). Pull strand snug, but not tight enough to distort lay of rope. Make sure you do not disturb the lay of the pairs (do not twist them).
note:
Prior to beginning tucks, insert small fid (1/4” or equivalent) between the throat of the splice and the chain link.
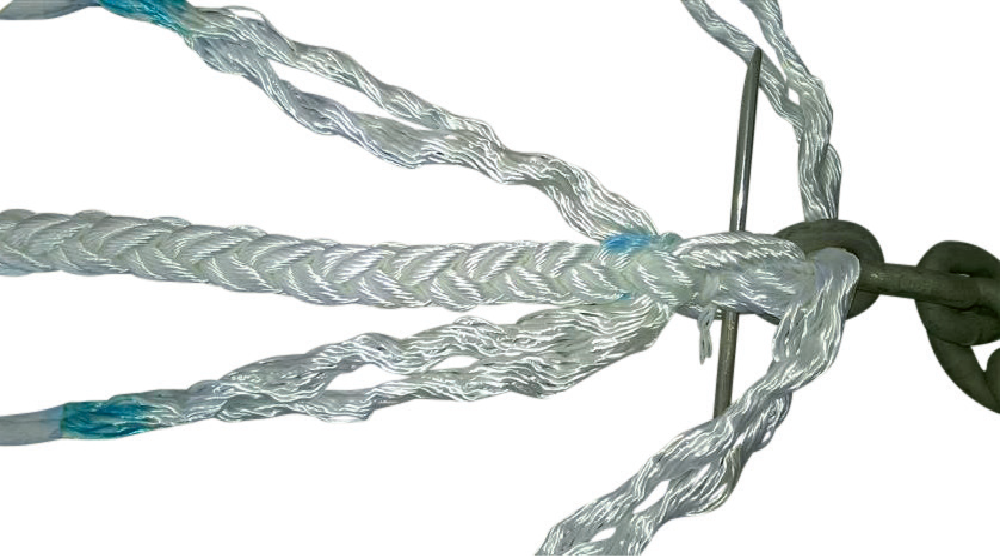
Figure 11
Step #11
Now turn the rope over; using a fid, slightly raise the single pair of un-marked Z-direction strands that are on the opposite side from the pair used on the previous step. Then tuck the second pair of marked S-direction strands under those Z-direction strands (as shown). Pull snug but not tight enough to distort lay of rope.
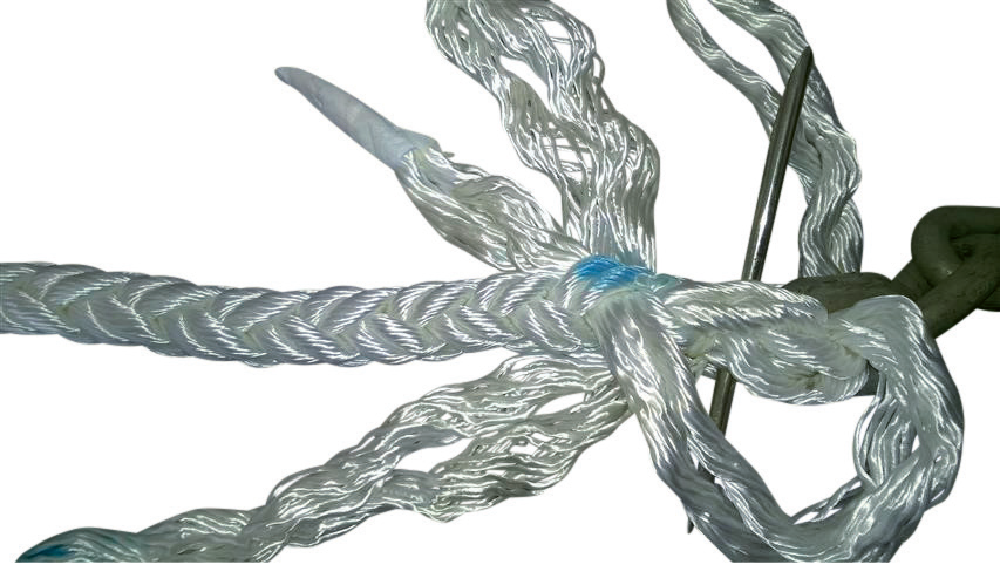
Figure 12
Step #12
Raise the single pair of marked S-direction strands. Then tuck the pair of un-marked Z-direction strands under those S-direction strands (as shown below). Pull snug but not tight enough to distort lay of rope.
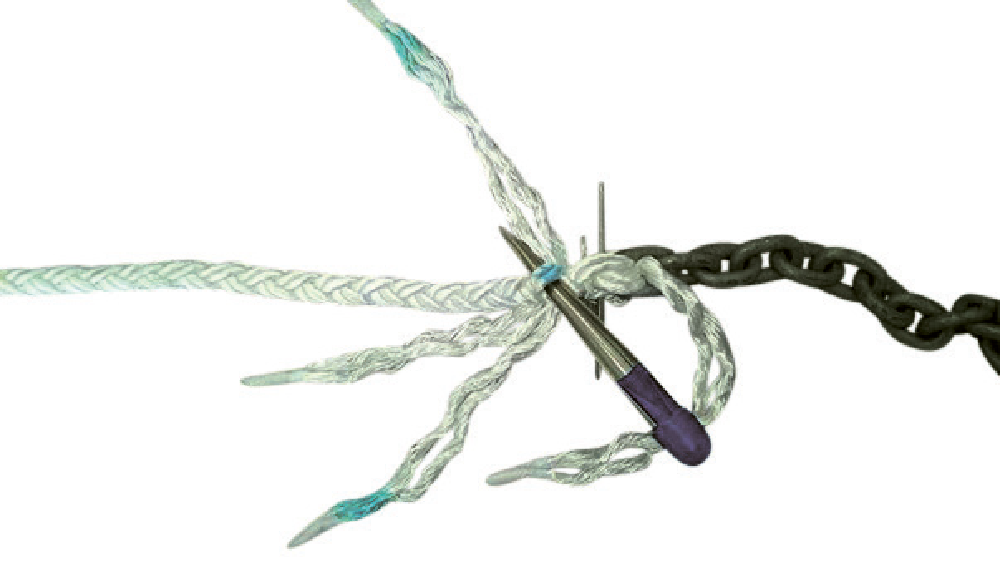
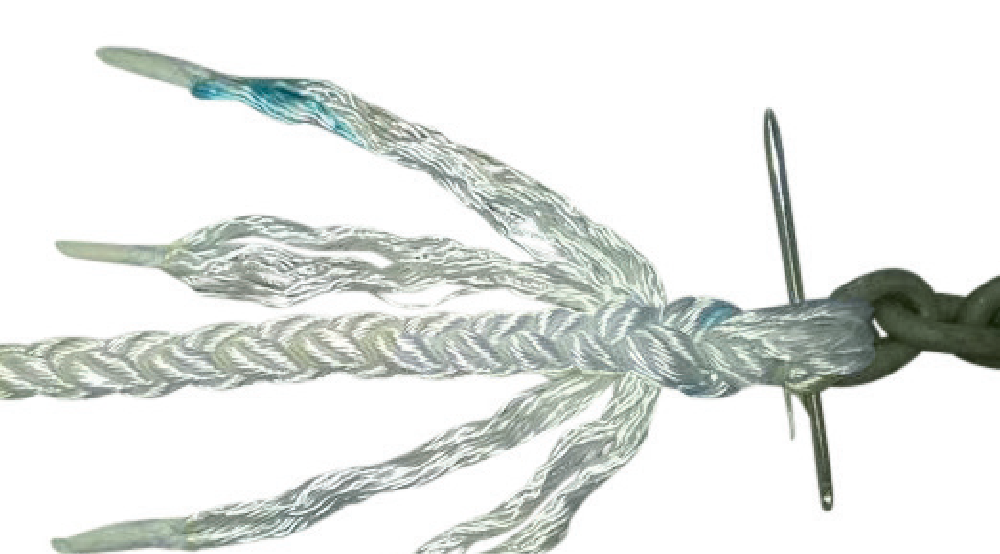
Figure 13
Step #13
Now turn the eye over again; raise the single pair of marked S-direction strands that are on the opposite side from the pair used on the previous step. Then tuck the remaining pair of un-marked Z-direction strands under those S-direction strands (as shown below). Pull all strand pairs snug to the chain.
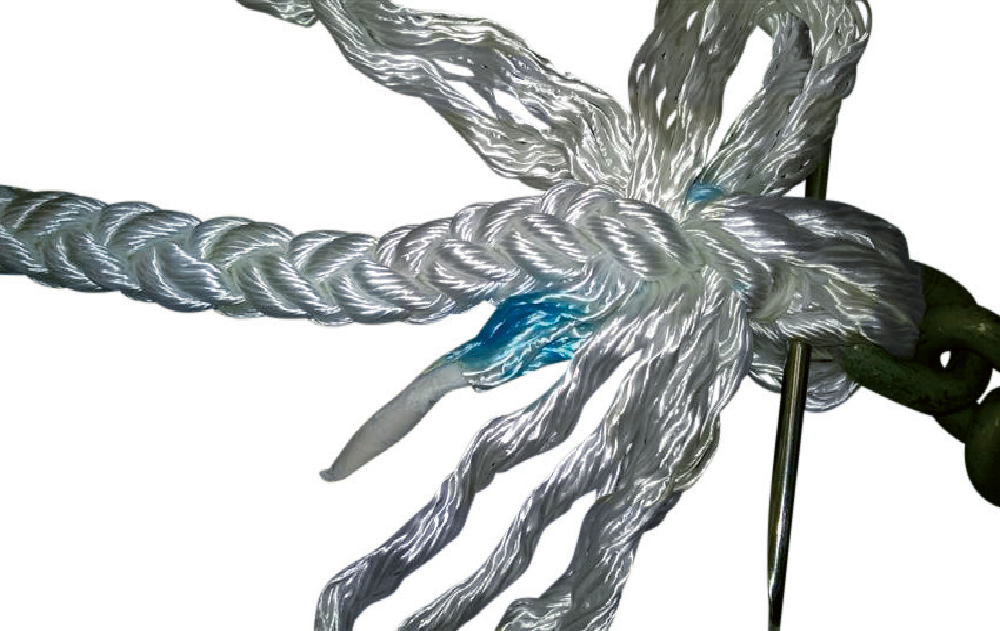
Figure 14
Step #14 – Strand Tucks
The method for the next series of tucks is to go over a strand pair then under a strand pair. In this splice, when you go over a strand pair you need to follow the braid of the rope (as shown in photo). So, essentially you are doubling up the braid from two strands to four.
Perform this second set of tucks with all four strand pairs. Then pull the strands firmly while avoiding twisting of the strands.
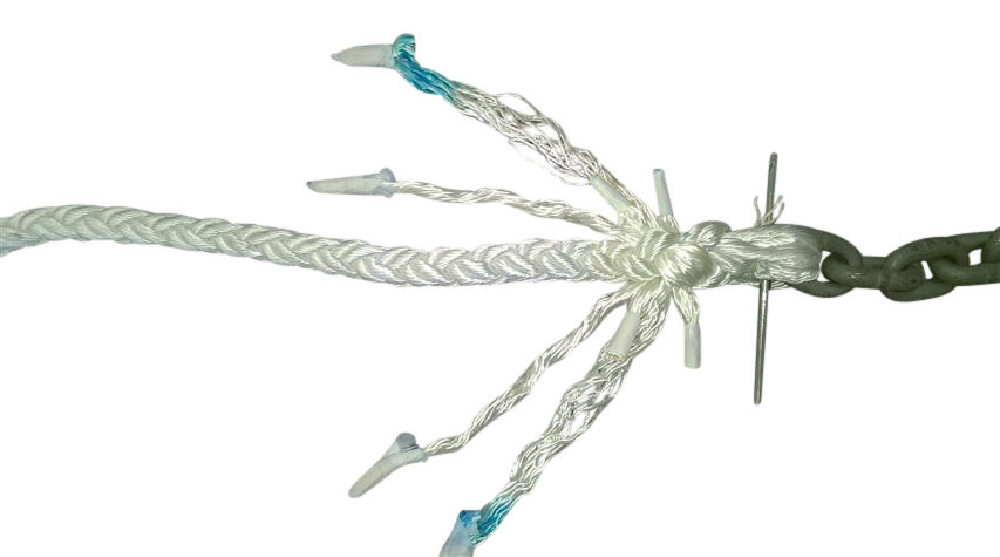
Figure 15
Step #15 – Taper
After the second full tuck, cut off one strand from each pair.
Note:
the strand to cut from each pair is the strand closest to the chain.
The tail of the cut strand should be at least one rope diameter long and/or as long as need be to ensure it will not be drawn back into the rope when under load.
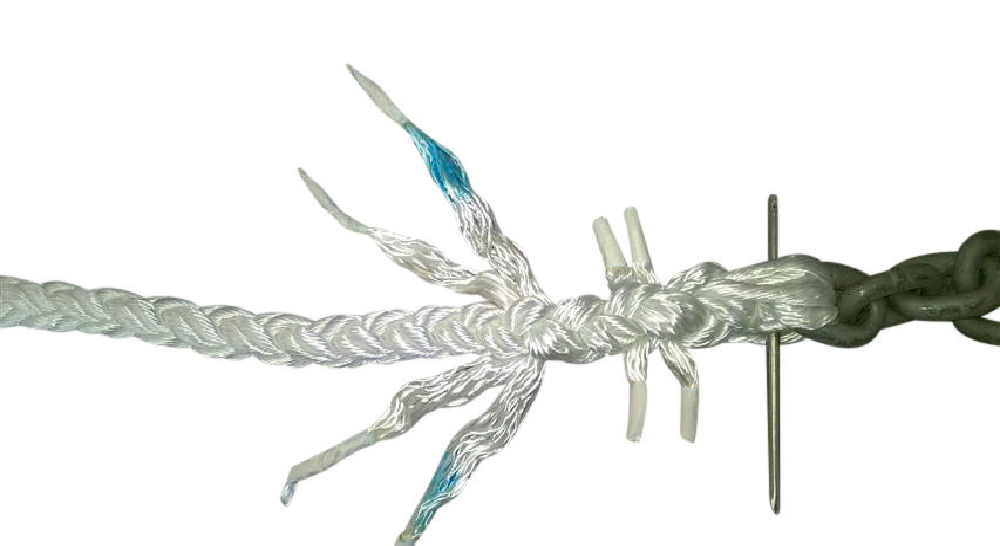
Figure 16
Step #16
Tuck all four (4) of the split strand pairs an additional two (2) tuck, following the method described above.
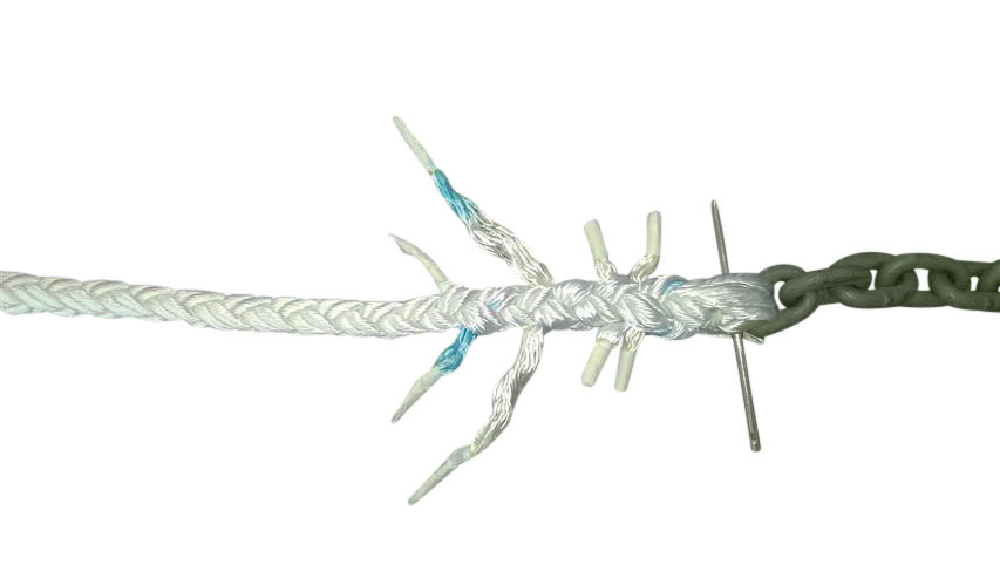
Figure 17
Step #17
Next, tuck only two (2) of the strands two (2) more time (1“S” and 1 “Z”)
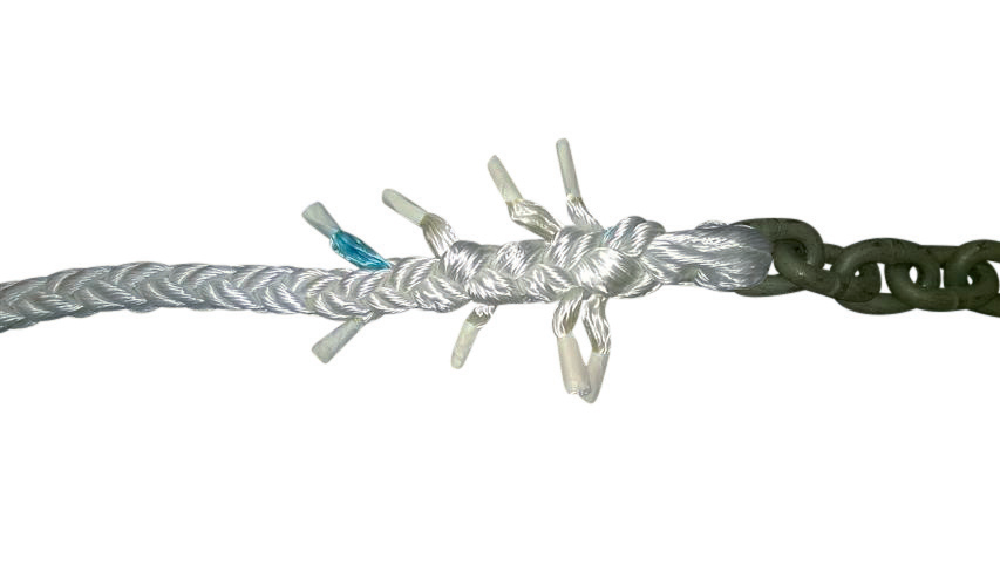
Figure 18
Step #18 – finishing the splice
Remove the fid and pull all strands snug one final time.
Using a hot knife, trim strands to a length equal to the ropes diameter.
